Monday, 30 March 2009

SVA Test Day - The Final Hurdle

SVA!!!!


I cant believe today is the day we have both been working so hard for has finally come and all of a sudden it feels too soon. We've been so busy I've only just been hit with pre SVA nerves. I wont lie we want it to pass but if it fails it fails and we will make the necessary changes. I know Dad's worried about just getting there but i really think what we have built is a quality working car if not a little rough around the edges but thats just the aesthetics.

We both managed to get the day off so one of us can drive the MNR and one can drive a support car incase anything goes wrong and to carry all the bits and bobs we might need - basically the whole garage just incase a stupid fail can be rectified there and then.

Half the kit in the boot. The rest scattered over the back seats and front passenger footwell.


Mitcham is about 8 miles away from where we live going through roads that have some heavy traffic during rush hour. Were up at sun rise to get final bits prepared and be prepared to leave at 7am to hopefully miss the bulk of traffic seeing as the cars not been thoroughly test.

At 7am we were ready to leave with the Leons engine running and the MNR on the road. Dad strapped himself in and started the beast in the near zero temperatures. Started easily like it has since all cylinders have been working correctly. Dad went to lead, moved a few feet and stopped. I can hear his voice and "Oh shit!" comes into my thoughts. The clutch has gone as dad finds the pedal floppy unlike its normal feel. All systems go we got it back on the drive and in the air. Hoping it was the easier of the two faults we loosened the bolts that retain the clutch cover, release the clutch arm and rotate the lever till we have some feel. Bolt it together and check the clutch. It has feel half way down then doesnt move which means the clutch spring plate has inverted meaning full clutch cover, cable retaining ring and spring plate removal. Fiddly work with everything in the way but we complete both attempts in under an hour. To avoid the problem again we set our clutch pedal stop to the maximum. Not ideal but we couldnt risk it happening again.

Second attempt at getting on the move and were off but in busy morning traffic both fddling our thumbs and counting the minutes to hope we make it. Dad's clearly nervous as the indicators are staying on for a mile after the turn and im just praying every stop in traffic that the clutch quick fix holds out. We manage to get to a petrol station and fill it up with BP's finest but the restictor almost completly stops fuel getting in and only the lightest grip on the pump trigger gets fuel in. At the same time fuels dripping from the tank where the filler hose hasnt been tightened enough from the day before. For the time being we left it and kept on to the VOSA test centre. With 15 minutes to spare we make it and no longer care pass or fail as atleast we had made it as if we hadnt it would almost be a dead cert it would be rescheduled under IVA which for this car would be nigh on impossible or involve terrific expense.


After all the bad things i have heard about testers the chap that will decide the fate of the Vortx is very nice, laid back and chatty through out giving us the chance to make as many simple mods as possible. Unfortunately the very first test on emissions shows a fail at fast(2500-3000rpm) and standard idle and even 3 attempts later its no better. Being nothing we could change we started to feel a bit more relaxed taking in all the testers useful info ready for a retest.


Next up was the radius and safety tests. Our hugely wobbly bumper bar was an instant fail. A few odd nuts and bolts required covers which we luckily had. The tough foam surrounds for the clocks and seat mounts unfortunately failed due to unsuitable materials as thick rubber would be more weather resistant and absorbing in a crash. The OMP wheel with quick release boss failed as it needs to be collapsable - never knew about that! Pipe lagging on the dash bars wasnt needed as the alumium edge of the scuttle is filed down. The seats belts are fine to raise up to the seat but need to have thicker plates acting as support to spread the load on the floor - 100mm x 100mm x 4mm thick or the belts can be put around the seat for the easier fix.

The fog light failed on not being completely vertical which we tried to ammend with hose but it needs to be rotated at a massive degree to pass which we also left for the retest. The rest of the engine bay, lights, interior, underside, boot and suspension etc all passed fine. The fuel neck restictor was tested and passed - good thing we ordered one on friday.


Next is the speed test where the driver is asked to take the car up to 20, 20, 40, 50, 60, 70 mph to test indicated and actual speed. The calculation for the speedo healer worked great to accomodate the wheels and 3.38 diff. Up on the ramps we were asked to remove a wheel nut from the front and rear wheel - fine no problem although ive never heard of this being tested

Onto the brake test we had left the bias bar not locked, ready to adjust at the correct level. It went on the rollers and looked like only the front wheels locked and nothing else performed great. I was thinking this could be really bad so ask the tester hows its going and it needs to be weighted at the weigh in bridge to work out braking force needed. We made it round to the weigh in bridge which is an easy on off test then parked round the side for the tester to make his calculations on braking force needed - Sounded grim. 15 mins later and he strolled over say its fine. we could have locked the bias bar on the spot but thought theres no point and asked him how he wanted it done for the retest - he will only accept drilled clevis yokes with roll pins or welded nuts no split pins or nylocs like we had planned.

Mirrors were next and the tall 6ft plus chap climbed in to check the rear vision which was fine with CBS "sva ok" mirrors. Final item was the self centering. On test drives ive been banging on at Dad to test this works and he always comes back not sure having never let the wheel out of his hands. Prior to the test we pumped the wheels to 40psi and left the stock MNR geometry settings. The tester asked us to put the wheel at full lock and drive with hands off the wheel. It quickly self centred after only a few feet - Job Done!


We receive our SVA fail after 20mins of waiting and get back happy we made it with a couple of items to recifty.

Sunday, 29 March 2009

Build Day 30 - Pre SVA

Hi, Im going to sum up 2 weeks now as its been rather a rather hectic period getting everything ready for our March 30th SVA date. After an almost guaranteed MNR SVA loan kit comprising of bumper bar with indicators, catalytic converter and mirrors with indicators we were sadly let down by MNR to source our own. With 2 weeks to SVA this was a suprise and a problem. First up the cat - no one seems to sell these in the size of the decat pipe we already had in place so we ordered one with the same bore as the silencer and collector. This meant we had to weld an insert to the cat to make it fit. Dad luckly had a day off to sort this out and it came up really nice - minimal splatter making it a tidy fit. Being a few cm's longer we had to extend the exhaust bracket. To keep the SVA man happy on the radius side of things we have covered the lot in heat mat with wire or steel ties. The instructions recommend running the cat for 10mins at a fast idle. It popped and banged which was a bit uneasing but then started smoking- EEP!. This was put down to being covered in heat mat as it was all round the exhaust but after 10mins everything settled down.


New mirrors arrived from CBS whom although a little dear offer the excellent service we have come to expect from them. Centre mirror isnt too pretty but does the job.


The bumper bar is the one item we really wished MNR could have got us. The cats expensive but is pretty simple. The bumper bar is cheaper to make but does a lot more, basically it means the entire front suspension is exluded from radius testing which is great as there are so many sharp edges and it also gives a mount for the indicators at the right height width that is suitable. Dads made something up which is a bit temporary but does the job - SVA only i assure you! Along with this we covered the bolts heads and nuts with nut caps where possible incase the bumper bar doesnt exclude them. Also thick heat shrink used to cover the track rod end adjuster nuts supported with cable ties as i've heard inspectors like to see them.


In the first sunny weekend a few friends and neighbours popped round to see what we've been doing all this time. All was going well untill the engine started to spluttler and eventually die. Trying to start again we noticed the fuel filter was filling with air so assumed we just needed some more fuel - simple! Turns out that didnt sort it and we could no longer hear the whizz of the fuel pump prime when the keys were turned. Instantly put this down to the pump and ordered a new one but were suspicious it couldnt handle no fuel for a couple of seconds although ive never run out of fuel in a regular car im sure it doesnt need a new fuel pump every time. A new Bosch 070 pump fitted again by Dad cured the problem which was reassuring with the SVA getting ever closer and i can assure you we will never go lower that a 1/4 of a tank.

MNR finally sent us some new switches which is great if not a little late but turns out there not the ones we sent back? Why im not sure. new ones arent green indicators but just blue blank switches. Oh well they will do for now. So finally we could assemble the scuttle and all the switches for final fitment. Of course this wasnt as simple as it sounds and numerous problems arose but i cant remember what they were but basically wasted another day with things not working/going in right and running issues again!


A picture showing the sidelights working now the scuttle is wired and bolted in.


Now its the friday before the sva and i saw a concerning topic on Locostbuilders regarding the need for a fuel neck restrictor(a little flap that makes only unleaded fuel pumps from a petrol station fit). Having never heard about this from MNR i was a bit shocked it had never been mentioned. I thought there would be nothing we could do but luckily CBS came up trumps again and having ordered it at 4pm in the afternoon it arrived saturday - phew! It apparenlty only fits/guaranteed to fit the CBS own filler caps but after removing our current one it fits perfectly from the back of the cap which is just the good news we needed although easily took an hour.


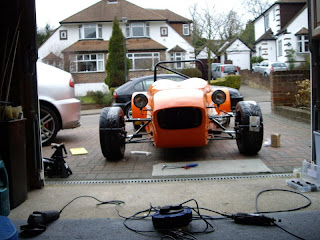
There are loads of other bits(last weeks list started at 50-60 jobs some major some minor) we've sorted over the last two weeks which would take an age to cover but i wont bore the readers that are still reading anymore. Finally the finished car the day before we drive to the test centre for our SVA.


Saturday, 14 March 2009

Build Day 29

Minor and Major Problems


Having run the engine one evening we have a suspicion somethings not right. The engine doest idle great and is difficult to start which having not owned a bike I assumed might just be normal. But today having the car outside i can see the headers are different colours, 1 is silver like they left the factory and the other 3 have a distinctive golden tint which i think is down to running on 3 cylinders even though its sounds and runs quite well. To diagnose the problem i can the car in diagnostics mode 32 to check the plug but as i thought it was fine and there is no smell of fuel in the chamber which leads to the injector testing i run all 4 and there is no click from 37(cylinder second from the front). Injector problem it is then! Being annoyed with another running problem i whipped the throttle body off and dismantled it down to the fuel rail in double time. I removed the offending inector and abused it with throttle body cleaner before leaving it in a injector cleaner bath. Being impatient i only left it 2-3 hours then refitted it all. Running diagnostics again all injectors click and with the engine running it starts easier, runs smoother and has a lower idle.


Interior


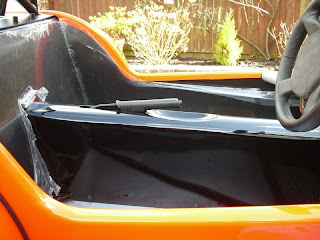
As the seats and belts have been test fitted the interior can be put in. Were using sika flex to hold it in place with the tunnel being held in by 6 bolts attaching to rivnuts. A handbrake gaitor has been made by my mum as she was feeling left out not working on the car - unlikely as she rather prefers the warm indoors! it took a while but the finished item is very nice and we hope the inspector will accept velcro to attach it.


Steering wheel cover


To get through SVA there cant be any sharp objects incase some one cuts there little finger or something stupid like that. Because of this were making a cover for the centrally mounted clocks and steering wheel. Were using dense foam that we shaped with a dremel and attached with cable ties.


Boot Cover


Dads been making one out of mdf thats become unsuitable for the job after finding out during the SVA the inspector may ask for it to be removed which would not be possible with the one he's made. We had planned to make something nice and neat after sva but with not much to do it made it worth doing now. It took a morning although much less time than was wasted on the first attempt and it looks really neat if not super fiddly to fit getting around all the roll bars. The hole in the middle allows us to fit a door that we can lock and also use to bolt and unbolt the cover if needed for inspection. With some hinges from b and q and 2 locks from screwfix it can be put together and offer some security.

Thats it! theres really not much else we can do as the final assembly is out of our hands with our savage indicator switches still with MNR to be replaced for a 3rd time after 2 sets were sent out wrong both being momentary rather than latching so the indicators dont stay on. We also need the MNR loan SVA kit which was ok 3 weeks ago but now isnt - leaving us both annoyed as we've come so far recently and had the hope a first time pass was possible but what can you do.

Sunday, 8 March 2009

Build Day 28

Brake Bleed
Last week we started on bleeding the brakes - a nice simple process of getting air out the system by opening the nipple on a caliper whilst the pedals pressed. Or so it should be. Whilst pumping the brakes i realised the bias bar (bar offering leverage to the seperate brake lines) was locking as it had too much room to move around the pedal meaning at a certain point the pedal would go no further and the brakes wouldnt not work - plain dangerous really! Only option was to start again - unscrew brake hoses, undo mounting bolts for cylinder, unscrew cylinder from bias bar and then unscrew bias bar clevis from bias bar to remove. Using some large washers we refitted the bias bar and tightend the two clevis's closer to the pedal to remove the chance the bar could lock. Then we refitted the rest and could bleed the system knowing the pedal could move fully without locking.

A new problem arose when we went to bleed the wilwood calipers as being american use a 1/4 inch bleed nipple. Luckily one of the chaps up the road, keen on his cars had a couple to spare. We managed to get good pressure on the pedal but had sprung a drip at the front t piece so we tried some ptfe tape to make a tighter seal.
Brakes all done we rolled the car down the drive and it happily stopped once the pedals pressed and even the handrake worked as it requires some hydraulic pressure

Thermostat Outlet
After fitting the bonnet the other week we realised a pipe going to the thermostat was not going to fit as it faces straight at the bonnet with no chance to turn and get out the way. There were a few solutions but basically involved a lot more reworking(cutting, welding, new hoses, more money and importantly more time). Jim helped out again as he thought a R1 top thermostat housing off a 5jj model would fit and he had one lying around. We snapped that up and it fitted perfectly although it does change the top hose location and the nose needs a little trim to accomodate this but is a far better compromise.


Interior Trim
Were actually running out of jobs to do at the moment so we thought we would chuck the already trimmed side and back panels in now the brakes and handrake were ok and hopefully would require any more attention. For SVA and for a quick fit were using velcro and tiger seal as post sva we need to make adjustments before fixing for good.

Seats
I cant remember if this has been mentioned before but we fitted the seats with the supplied spacers and trimmed where they would touch the tunnel and side panel. Attaced U trim to them and before they were fitted finally we made the holes for the seat belts and fitted them along with the seats. It is a bit tricky fitting the seat bolts when its on the floor so we opened the holes and used 2inch wide washers to spread the load.


SVA Covers
To get through SVA there cant be any sharp objects incase some one cuts there finger or something stupid like that. Because of this were making a cover for the centrally mounted clocks and steering wheel. Were using dense foam that we shaped with a dremel and attached with cable ties to the steering wheel and double sided tape to the dash.

Sunday, 1 March 2009

Build Day 27 - Starting to look like a car!

Final Fit - part 2


Back on with the final assembly were left with the nose cone. This never fitted well when we left it a few months back and well its the same now. We started with some trimming to clear the recently added water hoses and then shaped the lower chassis rail to get it within the nose cone. We trimmed the nose cone to accept the headlight bar and wiring. Like everything it went on and off 10-20 times untill it was as close as we could get it. It butts up to the side of the bonnet but for some reason there is a wider gap at the top of the nose cone. To secure it in place were using the 4 existing bolt holes at the top of the chassis and nothing else as its very tight.

Before fitting it all back together we refitted the headlight bar and headlights.


To finish off the nose cone were adding a black mesh grill. I shaped the grill with some excess to fit inside of the nose cone. I held it in place with a brick and then mixed up some P40(fibreglass paste) at sploshed it around the inside of the nose cone where it wouldnt be seen. Its very messy stuff and unforunately theres a bit of spillage that made its way onto the grill at the bottom.


Next up the bonnet and the catches. The catches are a two piece item a metal piece that rivets to the bonnet and the latch assembly and handle on the tub. We thought at first about using bolts and nuts but its far to fiddly for this. Rivets need to be used although the sound when they pop is worrying as if the whole tub has shattered. We are happy with the fit but with a bit more time we would push the scuttle forward and the nose cone back just to take up the 2mm gap.


Its really taking shape and its amazing that 1 days work can really make it look instantly more recognisable as a car.

Along with this ive wired the temp sensor, wired the switches to light up when on(hazard and fog) as required for sva as we dont want to drill 2 more holes and buy 2 more warning lights, wired and made a hole for the low brake fluid warning light, wired in the meter lights, fitted grip tape to the pedals. Dad tested the seats and they go in but the sides of the seat need some work to allow the tunnel and side panels to fit.