Battery
We now have all our positive cables from our car loom and the original bike loom going to a manual cut off switch with the other end returning to the battery. The negative side of things is the same but go just to the battery and an earth point tapped into the chassis. We made all the necessary holes fitted with big grommets and attached to the chassis with p-clips.
From the top

Below the scuttle all the cables waiting to be secured

To hold the battery in place we have the bracket we made from our second build day some 7 months ago. We have bolts holding in the both sides that also attach the top bracket making the battery removable.
Body Tub
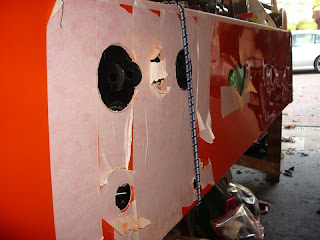
After loads of frankly crap boring jobs were finally fitting the body. There are a few things we would still like to finish but we need to do this to lift our spirits and get us back into the Sunday build routine. To start we cleaned the tub as it was filthy and had some giant spiders nesting in it. We masked the chassis and tub around any areas we thought might get damaged. On to the fitting, the first attempt was definitely the worst as it didn’t fit any where and the whole time we were moving it we thought it was going to snap or crack and ruin the finish but turns out its quite tough and flexible. The main thing holding it fitting snuggly, was the bodywork by the roll bar, the rear bulkhead and the steering support rail. For trimming, I used a dremmel which made mince meat of the glass fibre. The body went off and on several times before we were happy with the fit. We noticed there were 4 scribed round marks for the wishbones to exit the chassis in the wrong place but cut them out anyway as they stood out as it was. We then had to make the scribed holes wider for where they didn’t fit - bit pointless in having them really. Dad traced his templates onto the back of the body panels. We removed the tub again and then cut the panel by chain drilling close to the lines we had made. I then filed and used a rotary tool to smooth the area. Next fitting the engine cradle got in the way so we notched a semi circle for them. The tub started fitting quite well once this was done and then we moved onto the finer fitting of to body.
From the rear

The front passengers side where we have trimmed for the suspension, steering and exhaust

At the sides the body is wider than the chassis so we need to remove some from the section where the alloy floor panel overlaps causing a worryingly tight fit. The front wishbone mounts are also raised above the chassis tube level so that is going to need some spacing. It’s looking good now and to get it better were trying to force everything back into its original shape with clips, bungie straps and masking tape.
How we have left it for today

To give us an idea of how the car will look we got the scuttle, bonnet and nose cone into the garage. Looks like they will require a lot of trimming as well and the bonnet has definitely sagged as its a few inches, yes inches!!! wider than the body so were storing it up right, taped in position till needed next.
Heres how it will look with the nose cone on, looks like we've got lots of trimming ahead of us.

A real hard days work but it is such a big visual step we both can’t wait to work on it next - just what we needed.

