Headlight Bar and Units
The headlights are mounted on a beam that attaches to the top rail of the chassis. We positioned the headlight mounting bar as far forward as we could see from the manual picture and then measured from the scuttle and rocker arms to work out if the bar was dead centre and we marked this position on the tub. As our tub is raised above the chassis rail with spacers we had to make a hole in the tub the size of the rivnut tool so we could insert the rivnut to fix it down. We fixed an M6 rivnut on the chassis at either end as the bar will carry a fair bit of weight.

Then we drilled the bar to accomodate the M6 bolts and attached it with penny washers and thread lock. After a trip to the loft i found the C/F headlights and mounted them to the bars and fed the wire through to our wiring loom.

Were not sure if its cross eyed or just has one lazy eye

The connectors are different so i cut the ends off and opted for small bullet connectors.

Fuel Filler Cap
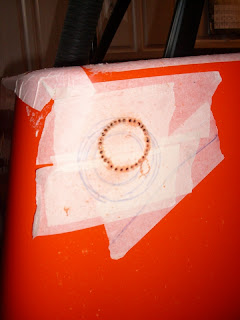
Whilst were waiting on some bolts and other bits to finish the rear my dad moved on with the fuel filler cap. We got the arch out of the loft and checked where it sits on the body as were thinking of mounting the cap on the rear drivers side. The position was marked and he then selected a nice central location. The outline of the cap was made and he chain drilled the hole to get a rough shape and rounded it with a dremmel.

With the cap in place he marked the holes for the counter sunk screws and drilled the holes so the key, upon locking remains vertical.

Once bolted in place the filler is connected to the tank with petrol filler pipe and two 50-55mm jubilees.

Coolant Tank
With the Scuttle in the garage for the tub fitment dad made some holes in the coolant tank bracket then transfered them to the scuttle so the tank could be attached with 4xM6 bolts, washers and nylocs.


